In this article, I will discuss common cordless drill problems and provide tips for fixing them. Whether you’re a DIY enthusiast or a professional tradesperson, it’s frustrating when your cordless drill encounters issues that hinder its performance. But fear not, with the right troubleshooting techniques, you can overcome these problems and get back to drilling with ease.
Key Takeaways:
- Cordless drill problems can impact performance and functionality.
- Overheating can be caused by various factors such as incorrect drill bit usage and lack of coolants or lubricants.
- Battery issues can arise from regular use and cold weather conditions.
- Loss of power could indicate poor maintenance and the need for servicing.
- Using the wrong drill bits can lead to slipping and damage to materials.
Common Cordless Drill Problems
Understanding these common cordless drill issues can help you identify and resolve problems quickly. In this section, I will discuss these common problems in detail and provide helpful troubleshooting tips.
1. Drill Bit Breakage
One common problem that users encounter is drill bit breakage. This can happen due to various reasons, such as using excessive force, drilling into hard materials without appropriate bits, or using worn-out drill bits. To prevent this issue, ensure that you are using the correct drill bit for the material you are working with and avoid applying excessive pressure.
2. Slipping of the Drill Bit in the Chuck
The chuck of a cordless drill holds the drill bit in place, but sometimes the bit can slip or loosen during operation. This can hinder your drilling efficiency and accuracy. To resolve this problem, make sure that you tighten the chuck securely around the drill bit before starting your work. Regularly check and tighten the chuck if you notice any slippage during drilling.
3. Chips Not Breaking Up Properly
When drilling, the chips need to break up properly to ensure smooth drilling and prevent clogging. However, sometimes the chips may not break up as expected, leading to difficulties in drilling and potential damage to the workpiece. To address this issue, ensure that the drill speed matches the material being drilled and use proper cutting techniques.
4. Damaged Point Angle
The point angle of the drill bit plays a crucial role in effective drilling. If the point angle becomes damaged or dull, it can lead to poor performance and increased wear on the bit. Regularly inspect the condition of the point angle and replace any damaged or worn-out drill bits to maintain optimal drilling efficiency.
5. Oversized Holes
Another common issue that users face is ending up with oversized holes when drilling. This can happen due to various factors, such as using the wrong size drill bit or applying excessive force. To avoid oversized holes, ensure that you are using the appropriate-sized bit for the desired hole diameter and apply consistent and controlled pressure during drilling.
6. Rough Holes
Rough holes can be frustrating and can affect the quality of your work. They may occur due to improper drilling techniques or using worn-out drill bits. To achieve smooth and clean holes, use the correct drill bit for the material and maintain steady drilling speed and pressure.
7. Quick Drill Bit Wear
Drill bits are subject to wear and tear with regular use, but excessive wear can lead to reduced drilling efficiency and increased costs for replacement bits. To minimise drill bit wear, avoid applying excessive force, use lubricants when appropriate, and choose high-quality drill bits made from durable materials.
8. Chips on the Drill Bit Lips
Chips on the lips of the drill bit can affect its cutting performance and accuracy. These chips can occur due to various factors, such as drilling into abrasive materials or using the wrong cutting technique. Regularly inspect your drill bits for chips and replace them as necessary to maintain optimal drilling results.
9. Chipping on the Cutting Edge
Chipping on the cutting edge of the drill bit can result in poor drilling and may cause damage to the workpiece. This issue can be caused by using worn-out or low-quality drill bits or applying excessive force during drilling. To prevent chipping, use high-quality drill bits and apply controlled pressure while drilling.
10. Drill Bit Wandering
Drill bit wandering refers to the bit moving off-course during drilling, resulting in inaccurate holes. This can happen due to various reasons, such as unstable drilling surface or incorrect drilling technique. Ensure that your workpiece is properly secured and use a center punch to mark the drilling position to prevent drill bit wandering.
11. Slow Drilling
Slow drilling can be caused by various factors, including low battery power, worn-out drill bits, or drilling at the wrong speed. To improve drilling speed, ensure that your battery is fully charged, use sharp and appropriate drill bits, and adjust the drilling speed according to the material being drilled.
Common Cordless Drill Problems
| Problem | Cause | Solution |
|---|---|---|
| Drill Bit Breakage | Using excessive force, incorrect drill bit, worn-out drill bit | Use correct drill bit, apply appropriate pressure, replace worn-out bits |
| Slipping of the Drill Bit in the Chuck | Loose chuck, insufficient tightening | Tighten chuck securely, check periodically during drilling |
| Chips Not Breaking Up Properly | Incorrect drill speed, improper cutting techniques | Match drill speed to material, use proper cutting techniques |
| Damaged Point Angle | Dull or damaged drill bit | Regularly inspect and replace damaged bits |
| Oversized Holes | Wrong size drill bit, excessive force | Use appropriate-sized bit, apply consistent pressure |
| Rough Holes | Improper drilling techniques, worn-out drill bits | Use correct drill bit, maintain steady speed and pressure |
| Quick Drill Bit Wear | Excessive force, lack of lubrication, poor-quality bits | Avoid excessive force, use lubricants, choose high-quality bits |
| Chips on the Drill Bit Lips | Drilling into abrasive materials, incorrect cutting technique | Inspect and replace damaged bits, use appropriate technique |
| Chipping on the Cutting Edge | Excessive force, worn-out or low-quality bits | Apply controlled pressure, use high-quality bits |
| Drill Bit Wandering | Unstable drilling surface, incorrect drilling technique | Secure workpiece, mark drilling position with center punch |
| Slow Drilling | Low battery power, worn-out bits, incorrect drill speed | Charge battery, use sharp bits, adjust speed accordingly |
Overheating of the Drill
Understanding the causes of overheating and taking appropriate action can help prevent safety hazards and further damage to the drill.
One of the main causes of cordless drill overheating is the use of incorrect drill bits. Using drill bits that are not suitable for the material being drilled can lead to excessive friction and heat generation. It is essential to choose the appropriate drill bit for the specific job to avoid overheating. Refer to the manufacturer’s guidelines or consult experts to ensure the right bit selection.
Another factor that contributes to drill overheating is the lack of coolants and lubricants during the drilling process. These substances help to reduce friction and heat buildup. Applying a coolant or lubricant to the drill bit and the surface being drilled can significantly improve heat dissipation. Make sure to use compatible coolants and lubricants recommended by the drill manufacturer for optimal results.
Non-stop drilling without breaks can also lead to overheating. Continuous drilling puts excessive pressure on the drill, causing it to generate more heat. It is crucial to take regular breaks during prolonged drilling tasks to allow the drill to cool down. This practice not only prevents overheating but also prolongs the life of the drill.
Drilling at the wrong angle can also contribute to overheating. Angles that are too steep or too shallow can cause the drill bit to bind or jam, leading to increased heat generation. Always ensure that the drill is aligned correctly with the surface being drilled to minimise heat buildup.
Finally, using worn-out drill bits can also result in overheating. Over time, drill bits can become dull and lose their efficiency, which can lead to excessive friction and heat. Regularly inspect and replace worn-out drill bits to maintain optimal drilling performance and prevent overheating.
If your drill starts to overheat during use, it is essential to stop drilling immediately. Continuing to use an overheated drill can pose safety hazards and cause further damage. Allow the drill to cool down before assessing the cause of overheating. Check for any issues with drill bit pressure, the use of coolants and lubricants, non-stop drilling, drilling angle, or worn bits. Taking appropriate action based on the cause can help prevent future instances of overheating and ensure the longevity of your cordless drill.
Quick Tips to Prevent Cordless Drill Overheating:
- Choose the correct drill bit for the material being drilled.
- Apply coolants and lubricants to reduce friction and heat buildup.
- Take regular breaks during prolonged drilling tasks.
- Ensure proper drill bit pressure and alignment.
- Regularly inspect and replace worn-out drill bits.
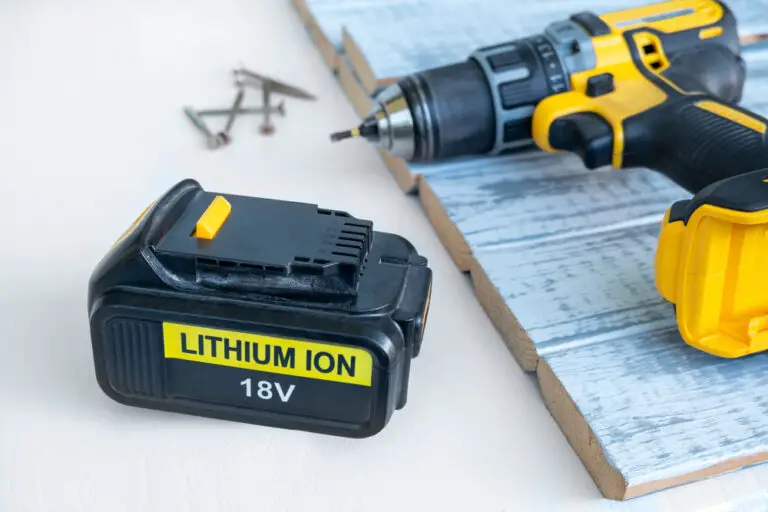
Battery Issues
When it comes to cordless drills, the battery is a vital component that can greatly impact its performance and longevity.
Cordless drill batteries can gradually lose their charge over time, especially with regular use and when drilling on harder materials. Additionally, battery performance can be affected by cold weather conditions.
Tips for Battery Maintenance
Here are some valuable tips to help you extend the lifespan of your cordless drill batteries:
- Choose the right drill for your specific job. Using a drill with the appropriate power and torque for the task can prevent excessive strain on the battery.
- Avoid applying excessive force when drilling. Let the drill do the work, and do not push it beyond its capabilities, as it can drain the battery quickly.
- Invest in a good-quality drill that uses high-performance batteries designed for long-lasting power.
- Regularly clean both the battery and the drill to remove dust, debris, and any other contaminants. A clean drill and battery connection ensures optimal electrical contact and prevents power loss.
- Store batteries in a cool, dry place, away from extreme temperatures and direct sunlight. This can help maintain their performance and prevent premature deterioration.
| Battery Maintenance Tips | Benefits |
|---|---|
| Choosing the right drill for the job | Prevents excessive strain on the battery |
| Avoiding excessive force when drilling | Minimises battery drain |
| Investing in a good-quality drill | Ensures long-lasting power |
| Regularly cleaning the battery and drill | Optimizes electrical contact and prevents power loss |
| Storing batteries in a cool, dry place | Maintains performance and prevents deterioration |
Loss of Power
If your cordless drill is not working as well as it used to, it may be losing power. While this can sometimes be attributed to battery issues, it is often related to poor maintenance. Regular cleaning, servicing, and addressing small wear signs can help ensure your drill performs optimally.
Regular Maintenance
To prevent power loss in your cordless drill, it is essential to establish a routine maintenance schedule. Clean the drill regularly with a soft cloth to remove dust, debris, and any residue that may accumulate over time. Pay special attention to the ventilation areas to ensure proper airflow, as clogged vents can lead to overheating and reduced performance.
Additionally, inspect the drill’s motor brushes for signs of wear. If the brushes appear worn or frayed, consider replacing them to maintain optimal power transfer. Lubricating the drill’s moving parts and gears with a suitable lubricant can also help reduce friction and extend the life of your drill.
Servicing and Repairs
If you notice persistent power loss or a significant decline in performance, it may be necessary to seek professional servicing or repairs. A qualified technician can diagnose and address any underlying issues affecting your drill’s power output.
Be proactive in addressing small signs of wear, such as loose screws or damaged handles, as these can contribute to power loss. Regularly inspect the battery contacts and terminals for corrosion or dirt buildup, as this can impede the flow of power.
Addressing Battery Issues
While power loss in cordless drills can sometimes be attributed to battery issues, it is crucial to rule out other maintenance-related factors first. If you have followed the recommended maintenance steps and are still experiencing power loss, check your battery for signs of deterioration.
Inspect the battery contacts for corrosion or damage and clean them if necessary. If the battery shows significant signs of wear or is not holding a charge, consider replacing it with a new, compatible battery.
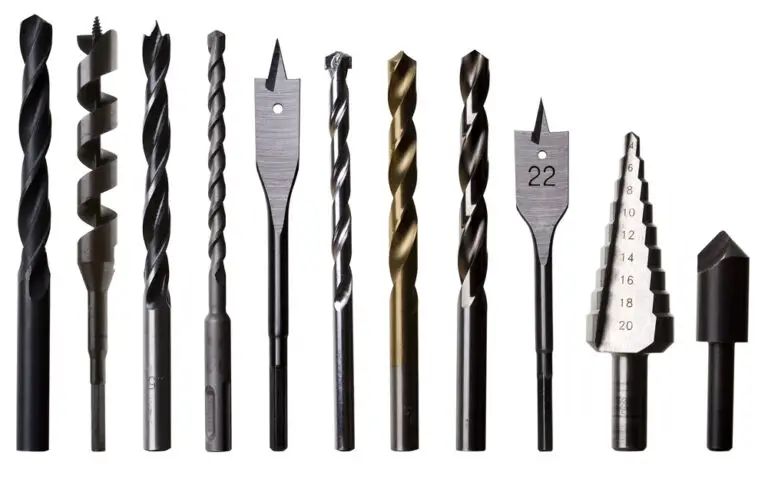
Drill Bit Fitment
Choosing the incorrect drill bits or ones that don’t fit properly can lead to frustrating results and potential damage.
To ensure a seamless drilling experience, it is important to use drill bits that are the right size and type for the material you are working with. Using the wrong size can cause the bit to slip or create oversized holes, while using the wrong type may result in the bit not effectively cutting through the material.
When selecting drill bits, consider the following factors:
- Size: Choose drill bits that match the size of the hole you need to create. Using larger bits than necessary can lead to imprecise drilling, while smaller bits may not be able to handle the required task.
- Material: Different drill bits are designed for specific materials, such as wood, metal, or masonry. Using a bit that is specifically designed for the material you are drilling will ensure efficient and precise results.
- Quality: Investing in high-quality drill bits from trusted manufacturers is essential for durability and improved performance. These bits are often made from high-speed steel or carbide, offering superior strength and longevity.
To further enhance your drill bit fitment, consider using a chuck with a secure grip. A chuck that securely holds the drill bit in place will minimize slipping and ensure accurate drilling.
Recommended Drill Bit Sizes for Common Applications:
| Material | Drill Bit Size |
|---|---|
| Wood | 3mm – 8mm |
| Metal | 2.5mm – 6mm |
| Masonry | 4mm – 12mm |
Using the recommended drill bit sizes ensures optimal performance and precise results for common drilling applications.
Worn Drill Parts
Regular maintenance is key to keeping your cordless drill in optimal condition. One critical aspect of maintenance is identifying and addressing worn drill parts.
When drill parts wear out, they can cause damage to the drill itself and compromise its effectiveness. Components such as the chuck, motor brushes, gears, and bearings can become worn over time due to continuous use and exposure to various working conditions.
When you notice signs of wear, such as decreased power, increased noise, or reduced precision, it’s time to take action.
Common Worn Drill Parts
Here are some common drill parts that may require maintenance or replacement:
- Chuck: Over time, the chuck jaws can wear out, leading to poor grip and potential slippage of drill bits.
- Motor Brushes: These small carbon components can wear down and affect the motor’s efficiency and power delivery.
- Gears: Worn gears can result in decreased torque and overall drill performance.
- Bearings: Damaged bearings can cause excessive vibrations, noise, and reduced drill stability.
Regularly inspecting these parts and promptly addressing any signs of wear can prevent further damage and extend your drill’s lifespan.
| Signs of Worn Drill Parts | Action to Take |
|---|---|
| Decreased power and performance | Schedule a maintenance or repair service and replace worn parts if necessary. |
| Increased noise and vibrations | Inspect and lubricate components or seek professional assistance if required. |
| Poor grip and slippage of drill bits | Check the chuck jaws and consider replacing them if worn. |
Remember, neglecting small problems can lead to more significant issues down the line, including overheating and drill malfunction.
Conclusion
Cordless drills are invaluable tools for DIY enthusiasts and professionals alike. However, like any equipment, they can encounter a range of problems that hinder their performance.
Regular maintenance is key to preventing and addressing common cordless drill issues. By cleaning your drill regularly and inspecting it for any signs of wear or damage, you can catch problems early and prevent them from escalating. Additionally, make sure to use the appropriate drill bits for the material you are working on and avoid excessive force, as it can cause slipping and overheating.
Another crucial aspect of cordless drill maintenance is battery care. Follow the manufacturer’s guidelines for charging and storage to maximize the lifespan of your batteries. If you notice a loss of power, consider replacing or reconditioning the battery to restore optimal performance.
Remember, a well-maintained cordless drill is a reliable tool that will serve you well for years to come.
FAQ
What are some common cordless drill problems?
Some common cordless drill problems include drill bit breakage, slipping of the drill bit in the chuck, chips not breaking up properly, damaged point angle, oversized holes, rough holes, quick drill bit wear, chips on the drill bit lips, chipping on the cutting edge, drill bit wandering, and slow drilling.
How can I troubleshoot cordless drill overheating?
Cordless drill overheating can be caused by using the wrong drill bits, not using coolants and lubricants, non-stop drilling without breaks, drilling at the wrong angle, or using worn bits. If your drill overheats, it is important to stop drilling immediately and assess the cause of overheating before taking appropriate action to prevent further damage and safety hazards.
What should I do to maintain my cordless drill batteries?
Cordless drill batteries can go flat with regular use and are affected by cold weather. To maintain battery life, use the right drill for the job, avoid excessive force, and invest in good-quality batteries. Regular maintenance and proper storage can also extend their lifespan.
Why is my cordless drill losing power?
If your cordless drill is not working as well as it used to and losing power, it may be related to poor maintenance. Regular cleaning, servicing, and addressing small signs of wear can help ensure optimal performance.
How important is it to use the right drill bits for my cordless drill?
Using the wrong drill bits or bits that don’t fit properly can lead to slipping, overheating, and damaged materials. It is crucial to use the right size and type of drill bits for the material you are drilling to prevent these issues. Choosing quality drill bits from trusted manufacturers can also improve performance and durability.
What can I do to maintain my cordless drill?
Regular maintenance, including servicing and replacing worn-out parts, is crucial for optimal cordless drill performance and longevity. Neglecting small problems can lead to larger issues down the line, including overheating and malfunction.
How can I troubleshoot common cordless drill issues?
By following the troubleshooting tips and maintenance guidelines provided in this article, you can overcome common cordless drill problems and ensure smooth and efficient drilling operations. Regular maintenance, proper use of drill bits, and careful attention to battery maintenance are key to achieving optimal performance with your cordless drill.
- Drill Battery Maintenance: Essential Tips for Cordless Drill Battery Care - February 5, 2024
- Troubleshooting Drill Issues - February 5, 2024
- Quick Drilling Techniques - February 2, 2024