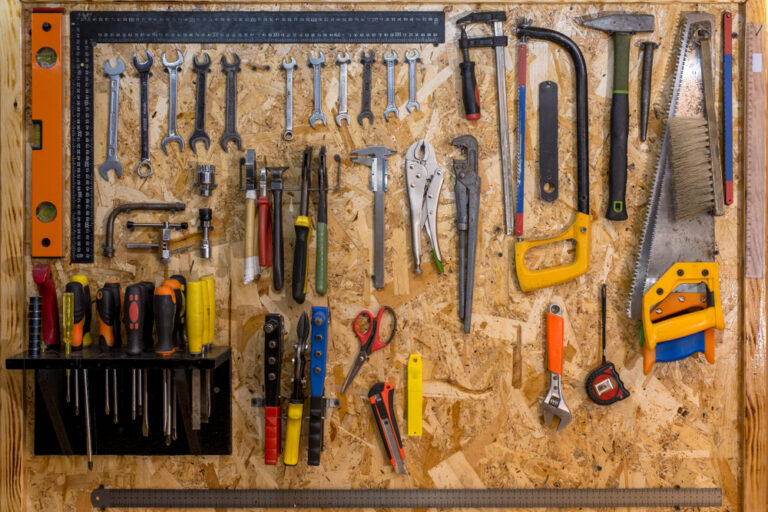
Woodworking is a versatile and rewarding craft that allows you to create beautiful objects from wood. Whether you’re just starting out or have some experience, it’s important to learn the basic woodworking techniques to build a strong foundation.
In this article, I will cover essential woodworking techniques and tips for beginners, including milling, jointing & planing, sawing, drilling & boring, routing, glueing & clamping, shaping & moulding, and sanding & filing.
Key Takeaways:
- Learn the basic woodworking techniques to build a strong foundation.
- Essential techniques include milling, jointing & planing, sawing, drilling & boring, routing, glueing & clamping, shaping & moulding, and sanding & filing.
- Proper milling ensures flat and square wood for easier workability.
- Jointing and planing create straight and smooth surfaces for accurate joinery.
- Choose the right saw for different cuts and projects.
Milling
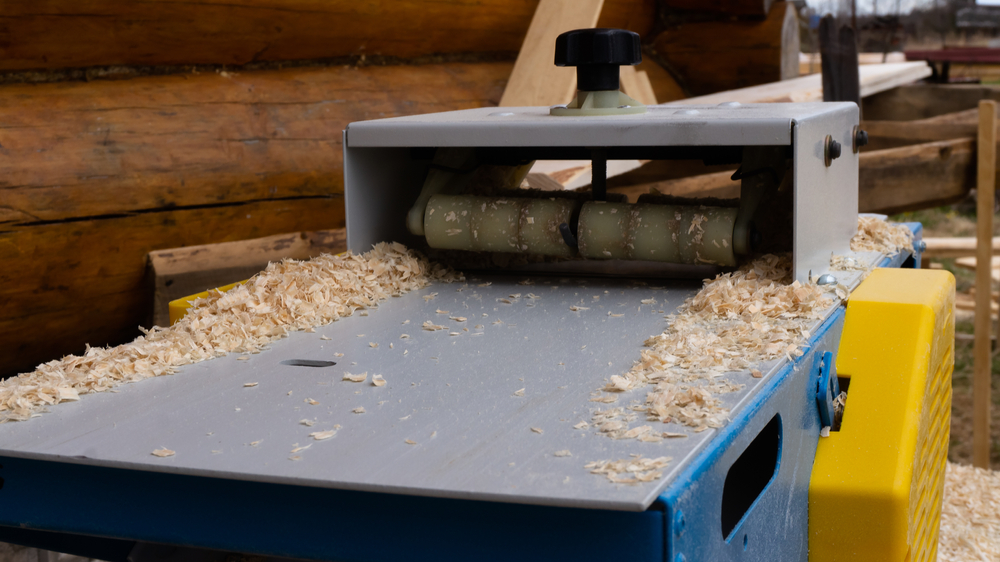
Milling is a crucial woodworking technique that transforms rough lumber into geometrically precise blocks ready for joinery. By following a series of steps, we can ensure that the wood is flat, square, and easier to work with in various woodworking projects.
First, I start the milling process by flattening one face of the board using a jointer. This powerful tool helps me achieve a smooth and even surface, removing any irregularities and producing a flat base for further work.
Next, I move on to smoothing the opposite face of the board using a planer. This essential tool helps in reducing the thickness of the board and creates a parallel, uniform surface. It also ensures that both faces of the wood are in perfect alignment.
Once the faces are flattened and smoothed, the remaining edge of the board needs to be cut parallel to the other using a table saw. This machine allows for precise and controlled cuts, guaranteeing a straight and consistent edge throughout the board.
Milling not only prepares the wood for joinery but also ensures that the final piece is structurally sound. By creating flat and square surfaces, the joinery process becomes more accurate, resulting in strong and durable joints.
| Step | Description |
|---|---|
| 1 | Flatten one face of the board using a jointer. |
| 2 | Smooth the opposite face of the board using a planer. |
| 3 | Cut the remaining edge parallel to the other using a table saw. |
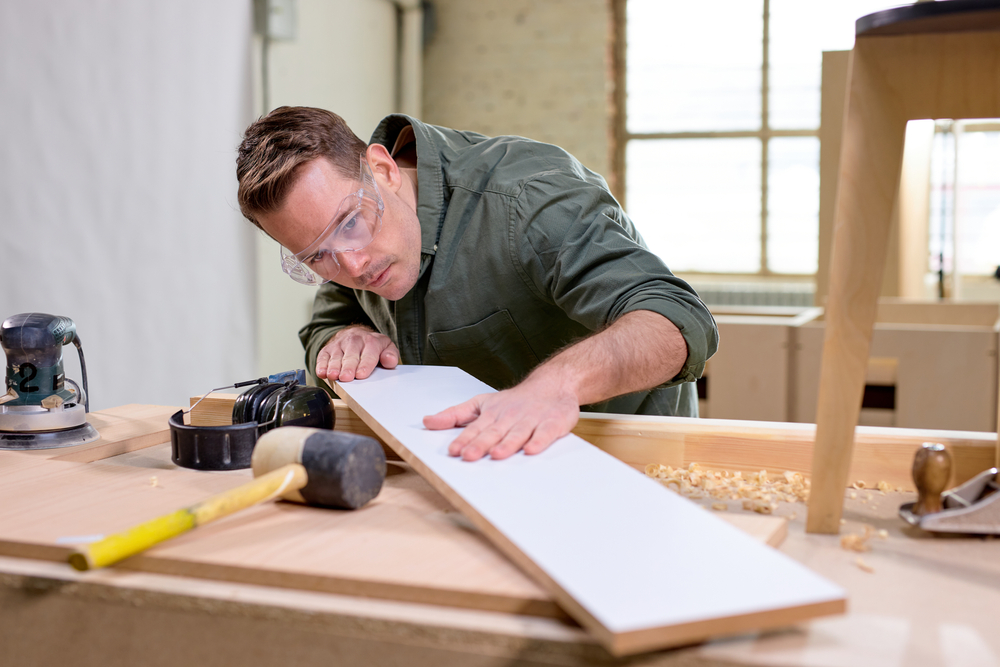
Jointing & Planing
When it comes to achieving flat surfaces and angled joints in woodworking, jointing and planing are essential techniques. Jointing is the process of flattening one face and one edge of a wooden board, ensuring it is straight and ready to be joined to other pieces of wood. On the other hand, planing is used to smooth the surfaces of the wood and remove any excess material.
Hand planes and electric planers are the tools of choice for jointing and planing. Hand planes offer a quieter approach and allow for finer details, while electric planers are faster and more efficient, making them ideal for removing larger amounts of material.
Jointing
Jointing is a crucial step in the milling process, where one face and one edge of a wooden board are flattened. This is done to ensure the board is flat and straight, providing a strong foundation for joining with other pieces of wood.
Planing
Planing is used to smooth the surfaces of the wood and create flat and even surfaces. Whether done with a hand plane or an electric planer, planing helps remove any excess material and prepares the wood for further woodworking processes.
To better understand the jointing and planing techniques, refer to the table below:
| Technique | Tool | Key Features |
|---|---|---|
| Jointing | Flattens one face and one edge of a wooden board | |
| Planing | Smooths surfaces and removes excess material |
Sawing
Sawing is a fundamental woodworking technique that is used in almost every woodworking project. When it comes to sawing, there is a wide range of tools to choose from, depending on the specific project and desired cuts.
Chop Saw
The chop saw is commonly used for rough-cutting lumber. It is a powerful tool that can quickly and accurately make straight cuts. With its robust design and sharp blade, the chop saw is ideal for cutting large pieces of wood to size with ease.
Hand Saws
Hand saws are portable and come in different shapes and sizes. They are versatile tools that can be used for various cutting tasks. From crosscut saws to rip saws, hand saws offer precision and control, allowing you to make accurate cuts by hand.
Portable Circular Saw
The portable circular saw is an efficient and easy-to-use tool. With its circular blade, it can make straight cuts through different types of wood. Its portability makes it convenient for on-site work and larger projects.
Table Saw
The table saw is a precise and versatile machine that every woodworker should have. It is designed for making straight cuts and is equipped with a table and fence for accurate measurements. Table saws are commonly used for ripping boards and making repetitive cuts.
Chainsaw
Chainsaws are primarily used for initial rough cuts and shaping projects. They are powerful tools that can quickly remove large amounts of wood. Chainsaws are commonly used in woodworking tasks such as log splitting, tree felling, and carving.
Bandsaw
Bandsaws are great for curved cuts and resawing. They have a continuous loop of teethed blade that moves on two wheels, allowing for intricate and contoured cuts. Bandsaws are ideal for cutting curves, irregular shapes, and resawing larger pieces of wood into thinner boards.
Scroll Saw
Scroll saws are used for intricate cuts and designs. They have a thin reciprocating blade that moves up and down, allowing for precise and detailed cutting. Scroll saws are commonly used in crafts, marquetry, and creating decorative patterns.
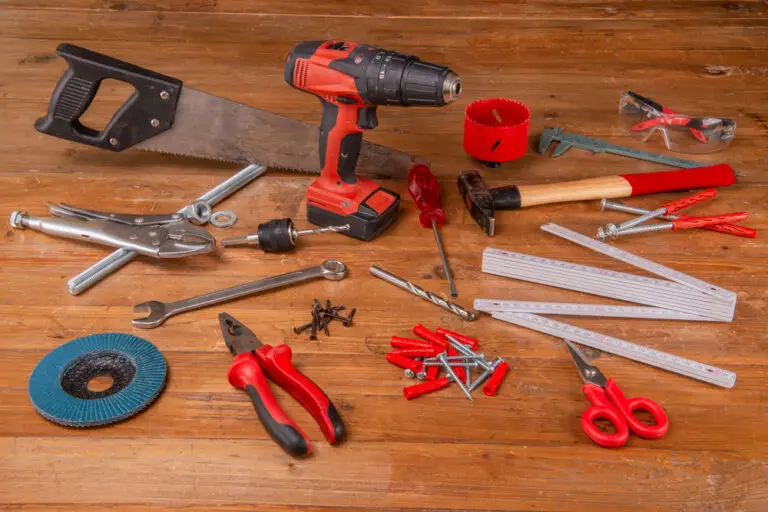
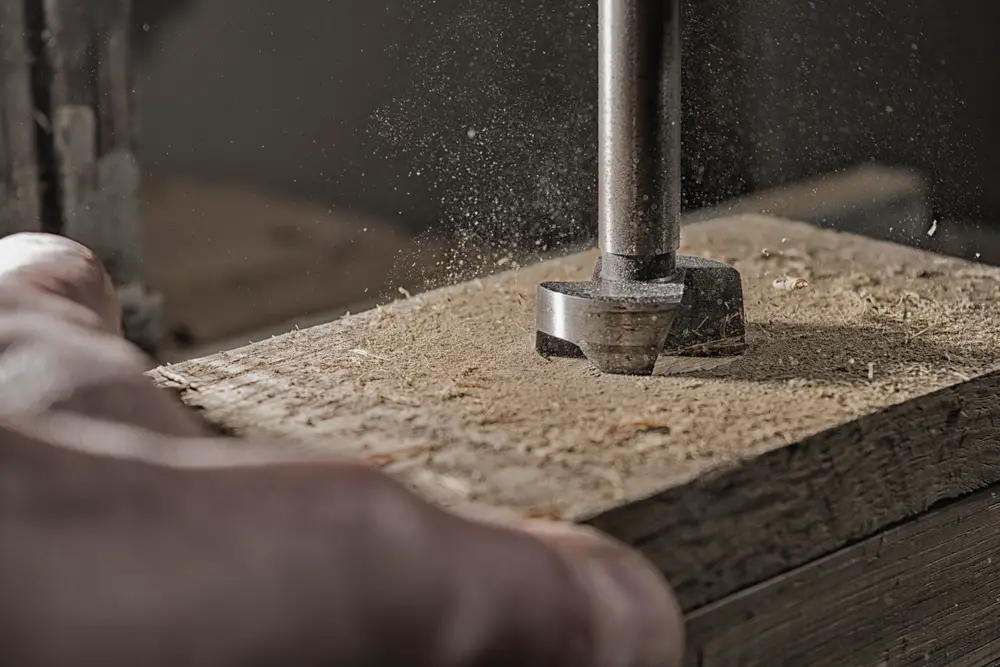
Drilling & Boring
When it comes to woodworking, drilling and boring are two essential techniques that allow you to create perfectly-sized holes in wood. Whether you’re building furniture, cabinets, or other wooden projects, the ability to drill and bore accurately is crucial. In this section, we’ll explore the tools, drill bits, and methods involved in drilling and boring.
Drilling
Drilling involves creating holes in wood using a drill bit attached to a power tool. There are different types of drill bits available, each designed for specific applications and hole sizes. Some commonly used drill bits for woodworking include:
- Twist bits: Ideal for general-purpose drilling tasks and can create holes of various diameters.
- Forstner bits: Used for drilling clean, flat-bottomed holes, often used in cabinetry and furniture making.
- Spade bits: Excellent for drilling large-diameter holes, commonly used when a clean finish isn’t crucial.
When drilling, it’s essential to choose the correct drill bit size for the desired hole and wood type. Using the wrong size can lead to issues such as weak joints or improper fit. Additionally, it’s crucial to select the appropriate drill speed and apply consistent pressure to avoid damaging the drill bit or wood.
Boring
Boring is the process of enlarging an existing hole in the wood to accommodate larger screws, dowels, or other fasteners. It’s often used to make a secure and precise fit between components. Boring is typically done using a drill bit specifically designed for this purpose, known as a “boring bit” or “expansive bit.”
A boring bit features an adjustable cutter that allows you to control the hole diameter. By rotating the bit clockwise, the cutter expands, increasing the size of the hole. This technique is useful when working with wood that tends to split or crack easily, as it reduces the likelihood of damage.
Drilling with a Drill Press
While handheld drill drivers offer convenience, a drill press provides greater precision and control for drilling tasks. A drill press is a stationary tool that holds the workpiece securely and allows you to position the drill bit accurately. This ensures consistent hole placement and depth, resulting in more accurate results.
When using a drill press, it’s crucial to adjust the drill speed to match the wood type and drill bit size. The cutting speed should be slower for hardwoods and faster for softwoods. Additionally, always secure the workpiece firmly on the drill press table and use clamps when necessary for added stability.
| Drill Bit Type | Wood Type | Recommended Speed |
|---|---|---|
| Twist Bit | Softwood | High speed |
| Twist Bit | Hardwood | Low speed |
| Forstner Bit | Any wood type | Medium speed |
| Spade Bit | Any wood type | Medium to high speed |
Routing
Routing is a fundamental woodworking technique that allows you to shape, cut, and trim wood with precision and creativity. By using a router, you can transform plain pieces of wood into beautifully crafted projects. Whether you’re creating edge treatments, cutting grooves, or following patterns, routing opens up endless possibilities for adding decorative elements to your woodworking projects.
A router is a versatile tool that can be used as a handheld device or mounted on a table for more stability and accuracy. It works by spinning a cutting bit at high speeds, which allows you to remove material and shape the wood according to your desired design. The router bits come in various shapes and sizes, each serving a specific purpose in achieving different routing techniques.
To create edge treatments, you can use router bits with different profiles, such as chamfer, roundover, cove, or ogee. These bits add decorative edges to your workpiece, giving it a professional finish. By carefully controlling the depth and speed of the router, you can create beautifully sculpted edges that enhance the overall look of your project.
In addition to edge treatments, routers are also excellent for cutting grooves in wood. You can use a straight bit or a groove bit to create precise and clean channels for joinery or decorative purposes. Whether you’re making dado joints or adding intricate details to your woodworking projects, the router provides accuracy and control to achieve perfect results.
Furthermore, routers allow you to follow patterns, templates, or stencils, enabling you to create intricate designs and details on your workpiece. By using a flush-trim bit or a pattern bit, you can reproduce complex shapes and contours with ease. This technique is particularly useful when creating signs, inlays, or custom furniture pieces that require precise replication.
To fully leverage the potential of routing, it’s essential to understand the capabilities of your router and the different routing bits available. Experimentation and practice will help you master this woodworking technique and unlock your creativity. So, grab your router, choose the right bit, and let your imagination guide you in creating stunning woodworking projects.
Gluing & Clamping
When it comes to woodworking, glueing and clamping are essential techniques for joining pieces of wood together. The right glue and clamp types can make a significant difference in the strength and durability of your project.
There are various types of glues available, each suited for different woodworking projects and desired strengths. Some common glue types include:
- White and yellow interior glue: Ideal for indoor projects where a strong bond is required.
- Exterior glue: Specifically designed for outdoor projects that need to withstand moisture and weather conditions.
- Epoxy glue: Perfect for filling gaps and increasing the overall strength of joints.
When using glue, it’s important to apply it evenly to both surfaces being joined, ensuring complete coverage. Allow the glue to set for the recommended time specified by the manufacturer before clamping the pieces together.
Clamps are used to hold the glued pieces in place until the glue dries, ensuring a tight and secure bond. Different clamp types are available, suitable for various sizes and types of woodworking projects:
- Bar clamps: These clamps use a long metal bar for applying pressure across larger workpieces.
- Pipe clamps: Consisting of long pipes with adjustable heads, these clamps are versatile and easy to use.
- F-clamps: These clamps have a fixed jaw and a sliding jaw, allowing for quick and precise adjustments.
- Spring-loaded clamps: These smaller clamps are perfect for holding smaller pieces or delicate components in place.
Using the right glue and clamp combination ensures a strong bond that will withstand the test of time. Remember to follow the manufacturer’s instructions for both the glue and clamps to achieve the best results.
Conclusion
Woodworking is a fascinating and fulfilling craft that allows me to unleash my creativity and bring beautiful wooden creations to life. By learning and practising the fundamental woodworking techniques, I can build a solid foundation and develop the necessary skills to take on more advanced projects. From milling and jointing to sawing, drilling, and sanding, each technique plays a vital role in crafting strong and finely crafted woodworking projects.
With the right tools and a little practice, I can confidently embark on woodworking projects, whether it’s creating functional furniture pieces or intricate decorative items. The wood joinery techniques I’ve learned enable me to securely and seamlessly connect various pieces of wood, ensuring the structural integrity and longevity of my creations.
Hand tools are essential companions in the woodworking journey, allowing me to shape, refine, and create with precision. From chisels and hand planes to mallets and saws, these tools become extensions of my hands, enabling me to bring my vision to life. Whether I’m working on small woodworking projects or larger-scale endeavours, having the right-hand tools is crucial.
Woodworking offers endless possibilities, and as a beginner, I am excited to explore different projects and continuously refine my skills. By understanding the basics, honing my techniques, and embarking on hands-on woodworking projects, I can cultivate my woodworking skills and create unique pieces that reflect my passion and dedication. So, let’s put on our safety gear, pick up our tools, and start our woodworking journey with enthusiasm and confidence!
FAQ
What is milling in woodworking?
Milling is the process of transforming rough lumber into geometrically precise blocks ready for joinery. It involves flattening one face of the board using a jointer, smoothing the opposite face with a planer, and cutting the remaining edge parallel to the other using a table saw.
What is jointing and planing?
Jointing is the process of flattening one face and one edge of a wooden board, while planing smooths the surfaces and removes excess material. Jointing and planing ensure that the board is flat, straight, and easier to join to other pieces of wood. Hand planes are used for finer details, while electric planers are faster and more efficient for larger amounts of material.
What are the different types of saws used in woodworking?
Common types of saws used in woodworking projects include chop saws for rough cutting lumber, portable hand saws in different shapes and sizes, portable circular saws for efficient use, table saws for precision and versatility, chainsaws for initial rough cuts and shaping, bandsaws for curved cuts and resawing, and scroll saws for intricate cuts and designs.
What are drilling and boring in woodworking?
Drilling creates a hole while boring enlarges an existing hole. Various drill bits can be used depending on the desired hole size and material, such as twist bits, forstner bits, and spade bits. Drilling can be done with a handheld drill driver or a stationary drill press for more precision and power.
What is routing used for in woodworking?
Routing is a versatile technique that involves using a router to shape, cut, and trim wood. Different router bits can create edge treatments, cut grooves, follow patterns, and more. Routers can be handheld or mounted on a table for precision. They are essential tools for adding decorative elements and creating intricate designs in woodworking projects.
What are the steps involved in glueing and clamping in woodworking?
Glueing and clamping are important steps in joining pieces of wood together. Different types of glue, such as white and yellow interior glue, exterior glue for outdoor projects, and epoxy for filling gaps and increasing strength, can be used. Clamps are then used to hold the glued pieces together until the glue has dried. Various types of clamps, including bar clamps, pipe clamps, F-clamps, and spring-loaded clamps, are available for different sizes and types of projects.
- Drill Battery Maintenance: Essential Tips for Cordless Drill Battery Care - February 5, 2024
- Troubleshooting Drill Issues - February 5, 2024
- Quick Drilling Techniques - February 2, 2024