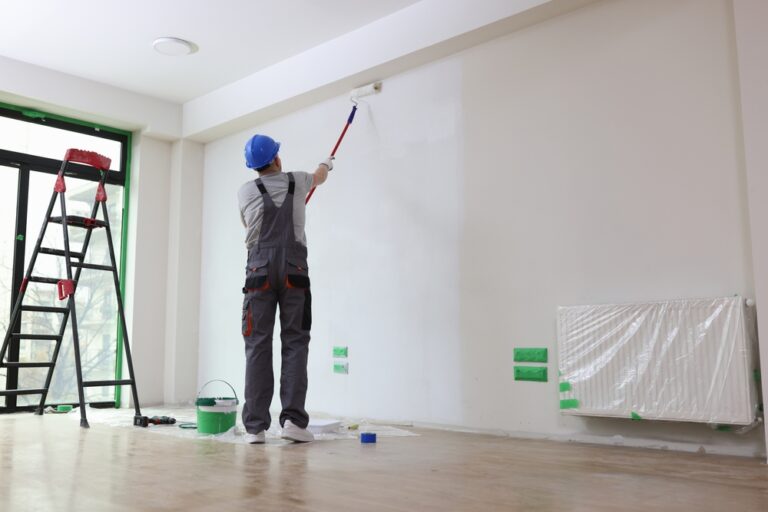
When it comes to paint projects, proper preparation is essential for a smooth and professional finish. Neglecting prep work can lead to visible holes, rough spots, and paint splotches that need to be fixed later. To ensure a streak-free coat of paint on smooth walls, follow these prep steps before painting:
Key Takeaways
- Proper preparation is crucial for a smooth and professional paint finish.
- Prep work includes patching and sanding for a smooth surface.
- Dusting and cleaning the walls before painting is essential.
- Using painter’s tape helps achieve clean and precise edges.
- Primer is beneficial for better paint adherence and hiding imperfections.
Patching and Sanding for a Smooth Surface
Before painting, it’s important to patch any holes in the walls and sand down the surface for a smooth finish. Follow these paint patching tips to ensure a flawless result:
- Start by applying spackle to the holes in the walls, using a putty knife. Fill the holes, ensuring the spackle is level with the wall surface.
- Allow the spackle to dry completely, following the manufacturer’s instructions. This typically takes around 24 hours.
- Once the spackle is dry, use fine-grit sandpaper to sand down the patched areas. Gently sand in a circular motion until the surface is smooth and even.
- After sanding, wipe the wall with a damp cloth to remove any dust or debris. This step is crucial to prevent dust particles from getting stuck in the wet paint.
| Patching and Sanding Tips |
|---|
| Apply spackle generously to ensure all holes are filled evenly. |
| Allow the spackle to dry completely before sanding. |
| Use fine-grit sandpaper for a smooth finish. |
| Wipe the sanded surface with a damp cloth to remove any dust. |
By patching walls and sanding the surface beforehand, you’re setting the foundation for a flawless paint job. This preparation step ensures that your walls are smooth, free of imperfections, and ready to be painted with ease.
Dusting and Cleaning the Walls
When it comes to painting preparation, dusting and cleaning the walls is a crucial step to ensure a smooth and flawless finish. Without proper cleaning, dust and debris can interfere with paint adherence and result in a subpar paint application. Follow these surface preparation tips to achieve the best results for your paint project.
1. Use a Vacuum for Dust and Pet Hair Removal
Start by using a vacuum cleaner with a brush attachment to remove any dust and pet hair from the walls, baseboards, trim, and molding. This will help eliminate loose particles that can mar the paint finish.
2. Dust the Walls from Top to Bottom
After vacuuming, take a barely damp cloth and dust the walls from top to bottom. Make sure the cloth is not too wet to avoid leaving watermarks on the surface. This step will help remove any remaining debris and ensure a clean canvas for painting.
3. Allow the Surface to Dry Completely
After dusting, it’s crucial to give the walls enough time to dry completely before applying painter’s tape or starting the painting process. A dry surface will ensure proper adhesion of the paint and prevent any issues with paint peeling or bubbling.
Remember, cleanliness is key when it comes to painting preparation. By taking the time to dust and clean the walls, you’ll set the stage for a professional-looking paint job.
| Benefits of Dusting and Cleaning the Walls | Steps to Follow |
|---|---|
| 1. Improves paint adhesion | 1. Use a vacuum to remove dust and pet hair |
| 2. Ensures a smooth and flawless paint finish | 2. Dust the walls from top to bottom with a barely damp cloth |
| 3. Prevents paint peeling or bubbling | 3. Allow the surface to dry completely before proceeding |
Using Painter’s Tape for Clean Edges
When it comes to achieving clean and precise edges in your paint project, painter’s tape is an invaluable tool. By using painter’s tape, you can easily tape off trim, molding, floors, and any other surfaces that you don’t want to paint, ensuring perfect paint lines with minimal effort.
One of the main benefits of using painter’s tape is that it makes the painting process faster and easier. With the tape in place, you don’t have to worry about painting a perfect line freehand. Instead, you can confidently brush or roll on the paint, knowing that the tape will create a barrier, preventing any paint from bleeding onto the adjacent surfaces.
When applying painter’s tape, make sure that the surface is clean and dry to ensure proper adhesion. Press down firmly on the tape to ensure a tight seal and avoid any paint seepage. Keep in mind that the tape should be removed while the paint is still slightly tacky to avoid damaging the dried paint. Carefully peel off the tape at a 45-degree angle to ensure clean, crisp lines.
Using painter’s tape is particularly important when taping off trim and other detailed areas. It helps create sharp and defined edges, giving your paint job a professional look. Whether you’re painting walls, furniture, or any other surface, painter’s tape is a must-have tool for achieving perfection in your paint lines.
So, before starting your next paint project, be sure to stock up on painter’s tape. With this handy tool, you can achieve clean edges and perfect paint lines, enhancing the overall appearance of your finished project.
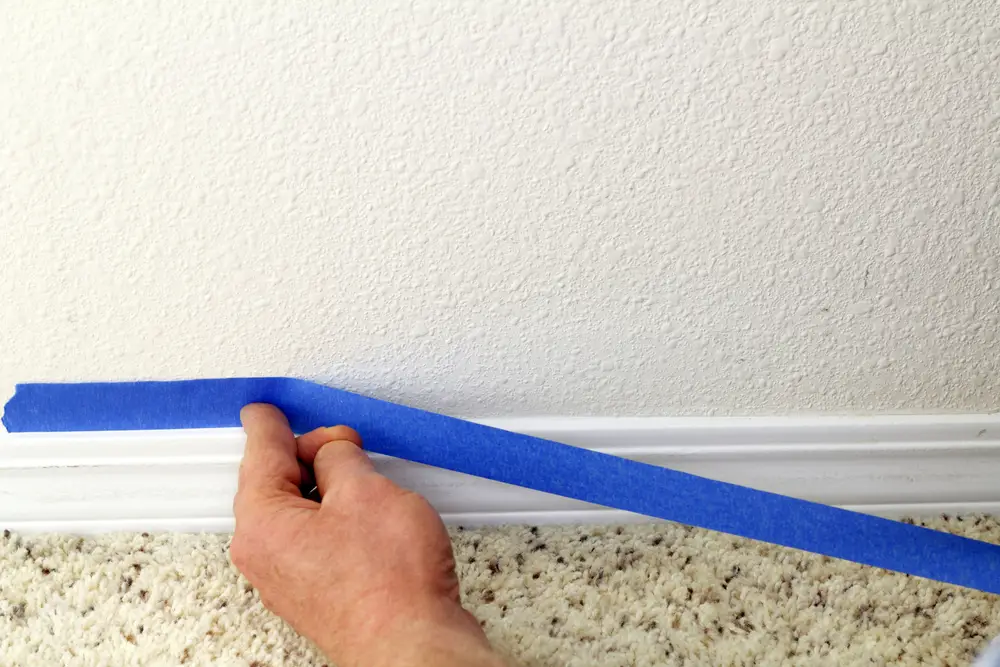
Taping Off Trim for a Polished Look
When using painter’s tape, it’s important to pay extra attention to taping off trim. Trim, such as baseboards, door frames, and window sills, often requires precise painting to achieve a polished look. By carefully applying painter’s tape along the edges of the trim, you can create sharp, clean lines that separate the painted surface from the trim, resulting in a professional finish.
The Benefits of Using Primer
When it comes to painting, primer is a game-changer. Not only does it allow for the easy application of lighter colours over darker ones, but it also offers numerous other benefits that contribute to a professional and long-lasting finish.
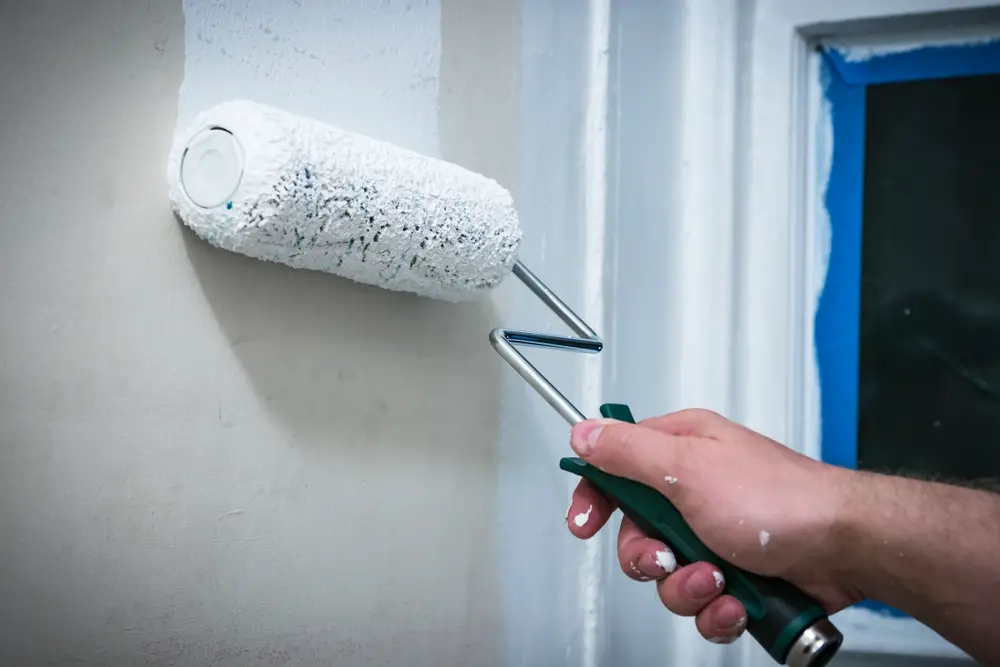
One of the primary advantages of using a primer is its ability to hide unevenness and imperfections on the wall. Whether you’re dealing with minor dents or patchy areas, primer acts as a foundation that smooths out the surface, creating a flawless canvas for your paint. By concealing these imperfections, primer ensures that your final coat of paint looks evenly distributed and visually appealing.
Additionally, primer plays a crucial role when painting over smooth or shiny surfaces, such as kitchen cabinets or laminate furniture. These surfaces can be challenging to paint because the paint tends to have poor adhesion. However, by applying a layer of primer beforehand, you create a surface that the paint can firmly grip onto, resulting in better durability and a professional finish. So, before revamping your kitchen or refreshing your furniture, don’t forget the power of primer!
| Benefits of Using Primer |
|---|
| Hides unevenness and imperfections on the wall |
| Improves adhesion on smooth or shiny surfaces |
| Enhances the durability of the paint |
| Creates a smooth and flawless surface |
| Allows for easier application of lighter colors over darker ones |
As you can see, primer is an indispensable tool in the painting process. Whether you want a seamless finish or need to overcome the challenges of painting over certain surfaces, primer is your secret weapon. Don’t skip this essential step in your surface preparation for paint, and you’ll be rewarded with a professional-looking and long-lasting result.
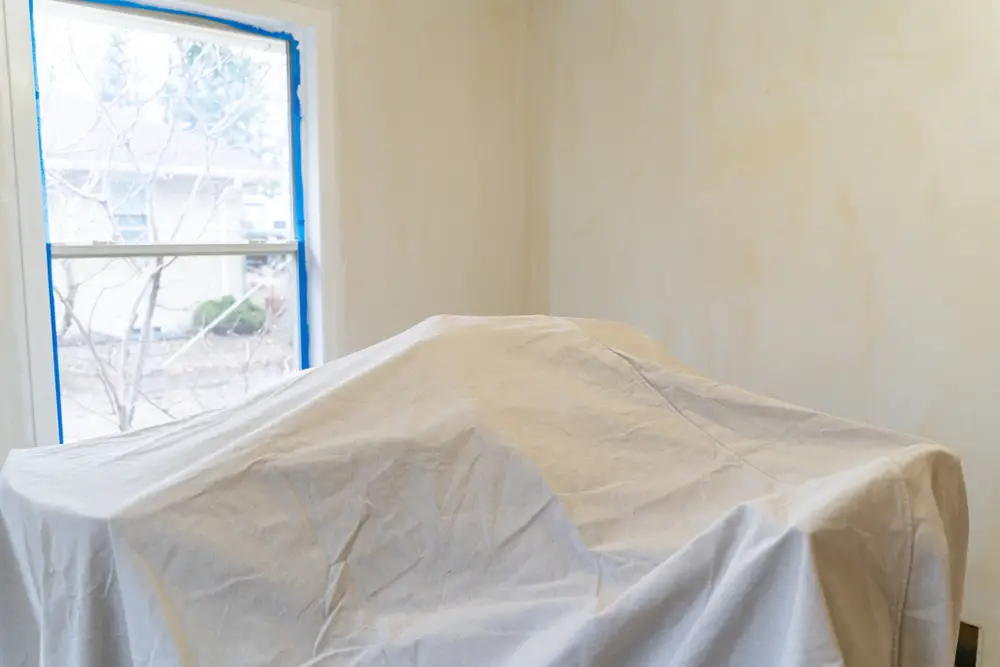
Protecting Furniture and Floors
Before starting a paint project, it’s crucial to take the necessary steps to protect your furniture and floors from paint splatters. This will ensure that your valuable belongings stay safe and free from any accidental damage. Here are some useful tips for furniture protection and floor coverings during the painting preparation process:
- Cover all furniture: If possible, it’s best to remove all furniture from the room being painted. This eliminates the risk of any paint splatters or spills. However, if moving furniture is not feasible, cover them with tarps or drop cloths. Make sure to completely cover each item, ensuring no exposed areas.
- Roll up rugs: Roll up any rugs or carpets in the room before you begin painting. This will protect them from any accidental paint drips or spills. Store the rolled-up rugs in another room or area until the painting project is complete.
- Use protective decorators’ dust sheets: Lay down protective decorators’ dust sheets on the floor surface. These sheets are specifically designed to protect floors from paint splatters and spills. Make sure to cover the entire floor area to prevent any damage. Secure the sheets in place using painter’s tape or any other suitable adhesive.
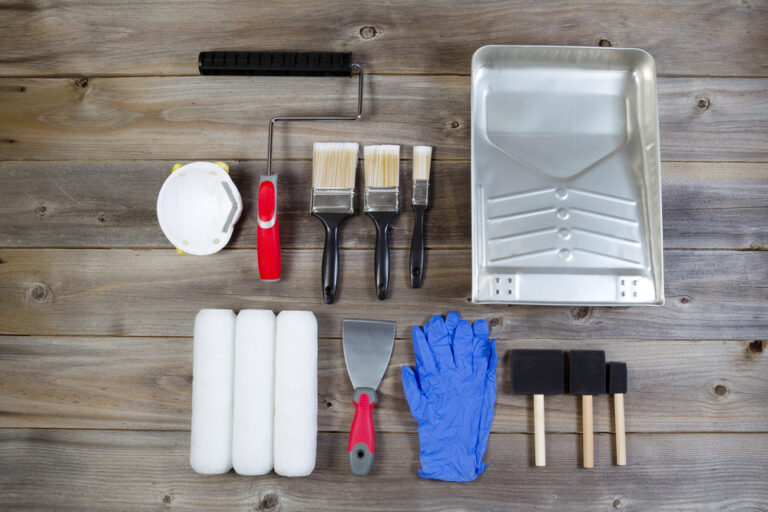
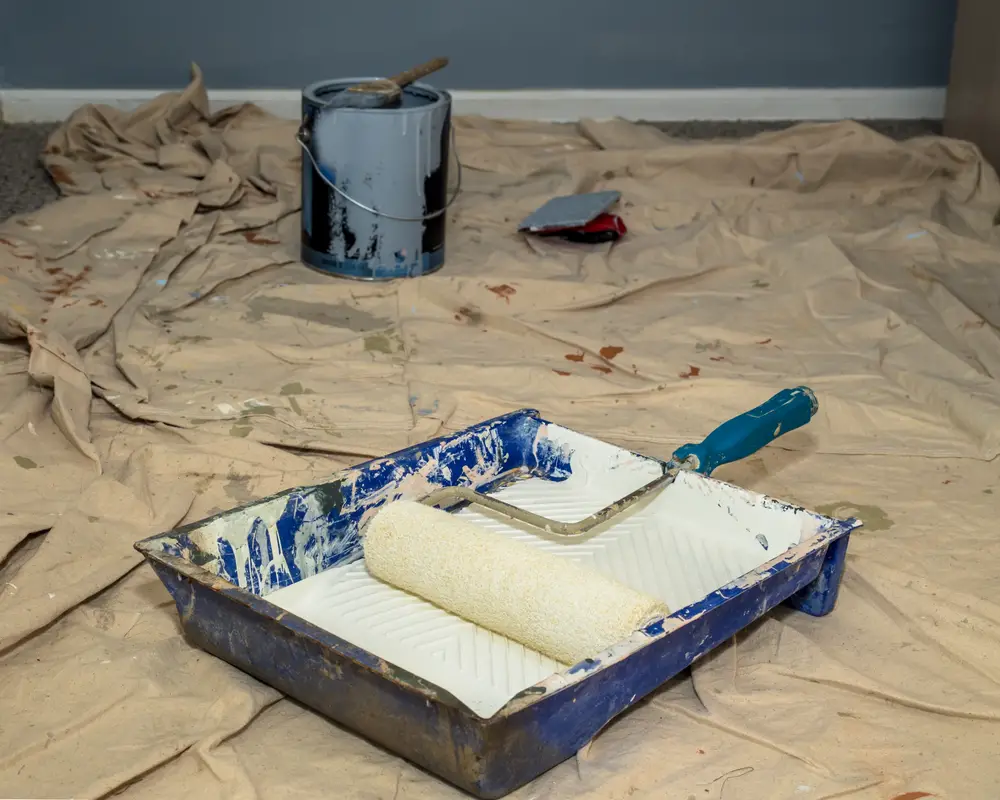
Gathering the Right Tools
Having the right tools is crucial for a successful paint project. To ensure a smooth and professional finish, gather the following essential painting supplies:
- A sharp stripping knife for removing old wallpaper
- Fine sandpaper for smoothing the surface
- Soap and sponge for cleaning
- Gloves and a bucket for protection and cleaning
- Masking tape to protect skirting boards and switches
- Wall filler and a filling knife to tackle any holes or gaps
- Protective decorators’ dust sheets to cover flooring and furniture
- Paintbrushes for edges and corners
- Paint rollers for central surface areas
- Safety glasses and a mask for personal protection
Conclusion
By following these essential prep steps before starting a paint project, you can achieve painting success and achieve a professional finish. Properly patching and sanding the walls ensure a smooth surface for the paint to adhere to, while dusting and cleaning the surfaces create a pristine canvas for your paint. Using painter’s tape helps to create clean edges and avoid any messy mistakes during the painting process.
Additionally, applying primer before painting not only helps to cover dark colours but also hides any imperfections on the walls, resulting in a more polished look. Protecting your furniture and floors from paint splatters is crucial to avoid any damage to your beloved belongings. Lastly, gather all the right tools to make your paint project easier and more efficient.
By taking the time to properly prepare and follow these paint project tips, you can achieve a professional finish that will impress and enhance the overall look of your DIY project. So, grab your paintbrushes and rollers, put on your protective gear, and get ready to turn your vision into a reality!
FAQ
What are the essential prep steps before starting a paint project?
The essential prep steps before starting a paint project include patching and sanding the walls, dusting and cleaning the surfaces, using painter’s tape for clean edges, applying primer, protecting furniture and floors, and gathering the right tools.
How do I patch and sand the walls for a smooth surface?
To patch and sand the walls for a smooth surface, start by applying spackle to any holes and sand it lightly once dry. This will ensure that the surface is even and free of imperfections.
How do I dust and clean the walls before painting?
Dust and clean the walls before painting by using a vacuum to remove dust and pet hair, then dust the walls from top to bottom with a barely damp cloth to remove any remaining debris. Ensure that the surface is dry before taping or painting.
How do I use painter’s tape for clean edges?
Use painter’s tape to tape off trim, molding, floors, and any other surfaces that you don’t want to paint. This will make the painting process easier and ensure clean and precise edges. Remove the tape while the paint is slightly tacky to avoid damaging the dried paint.
What are the benefits of using primer?
Using primer is beneficial when painting a light color over a dark one or when trying to hide unevenness and imperfections on the wall. Primer also helps the paint adhere better to smooth or shiny surfaces like kitchen cabinets, resulting in a more professional and long-lasting finish.
How do I protect furniture and floors during a paint project?
Ideally, remove all furniture from the room being painted. If that’s not possible, cover them with tarps to prevent paint splatters. Roll up rugs and use protective decorators’ dust sheets to cover the flooring and furniture and prevent any potential damage.
What tools do I need for a paint project?
For a paint project, gather essential painting supplies such as a stripping knife, fine sandpaper, soap, sponge, gloves, a bucket, masking tape, wall filler, a filling knife, protective dust sheets, paintbrushes, paint rollers, safety glasses, and a mask. Having the right tools is crucial for a successful and professional finish.
How can I achieve painting success and a professional finish?
By following these essential prep steps before starting a paint project, you can achieve painting success and create a smooth, professional-looking finish. Proper patching, sanding, dusting, using painter’s tape, applying primer, protecting furniture and floors, and gathering the right tools are all crucial aspects of the painting preparation process.
- Drill Battery Maintenance: Essential Tips for Cordless Drill Battery Care - February 5, 2024
- Troubleshooting Drill Issues - February 5, 2024
- Quick Drilling Techniques - February 2, 2024