Hello and welcome to my guide on how to safely and effectively drill into tiles. As a DIY enthusiast or homeowner, this skill is essential for hanging mirrors, installing shelves, or any other home improvement project that requires drilling into tiles.
In this guide, I’ll take you through the process step-by-step, from understanding tile composition to selecting the right tools and techniques for the job. By following these tips and tricks, you can achieve a professional finish every time, without damaging your tiles.
Key Takeaways:
- Mastering the drilling technique for tiles is essential for any DIY enthusiast or homeowner
- Understanding tile composition is crucial in selecting the appropriate tools and techniques for drilling
- Proper preparation of the tile surface helps prevent the drill from slipping and damaging the tile
- Choosing the right drill bit, such as diamond-tipped drill bits, ensures clean and precise holes
- Safety precautions, such as wearing protective gear, should always be taken when drilling into tiles
Understanding tile composition
In this section, I’ll take you through the basics of tile composition and the different types of tiles you’re likely to encounter. Knowing these details can help you choose the right tools and techniques for drilling into tiles.
Ceramic tiles
Ceramic tiles are the most common type of tiles used in households. They’re made from a mixture of clay and water, which is then fired at a high temperature. This process creates a hard, durable surface, making ceramic tiles perfect for high-traffic areas like kitchens and bathrooms.
Porcelain tiles
Porcelain tiles are made from a finer mix of clay, sand and feldspar. They’re baked at a much higher temperature than ceramic tiles, creating a denser and more durable material. Porcelain tiles are highly resistant to water and stains, making them a popular choice for outdoor applications.
Other types of tiles
Other types of tiles include natural stone tiles, glass tiles, and mosaic tiles. Natural stone tiles are made from materials like slate, marble, and granite, and are often used for flooring. Glass tiles are a popular choice for backsplashes and accent walls because of their unique look. Mosaic tiles are made from small pieces of ceramic or glass and are often used for decorative purposes.
Understanding the tile composition is essential for drilling success. Knowing what type of tile you’re dealing with will help you choose the appropriate drill bits and techniques for drilling.
Gathering the Necessary Tools and Materials
Before beginning the tile drilling process, it’s important to gather all the necessary tools and materials. Here’s a list of what you’ll need:
- Power Drill: Choose a drill with adjustable speed settings and a variable speed trigger for more precise control.
- Drill Bits: Use carbide-tipped or diamond-tipped drill bits designed specifically for drilling into tiles.
- Safety Goggles: Protect your eyes from dust, debris, and tile fragments with a pair of properly-fitted safety goggles.
- Masking Tape: Use masking tape to protect the tile surface and create a guide for your drill points.
Make sure to choose high-quality materials that will last. This will ensure a successful and safe drilling experience.
Preparing the Tile Surface
Proper preparation of the tile surface is essential to avoid damaging the tile while drilling. In this section, I will explain the masking tape technique and how to mark drill points on the tile surface.
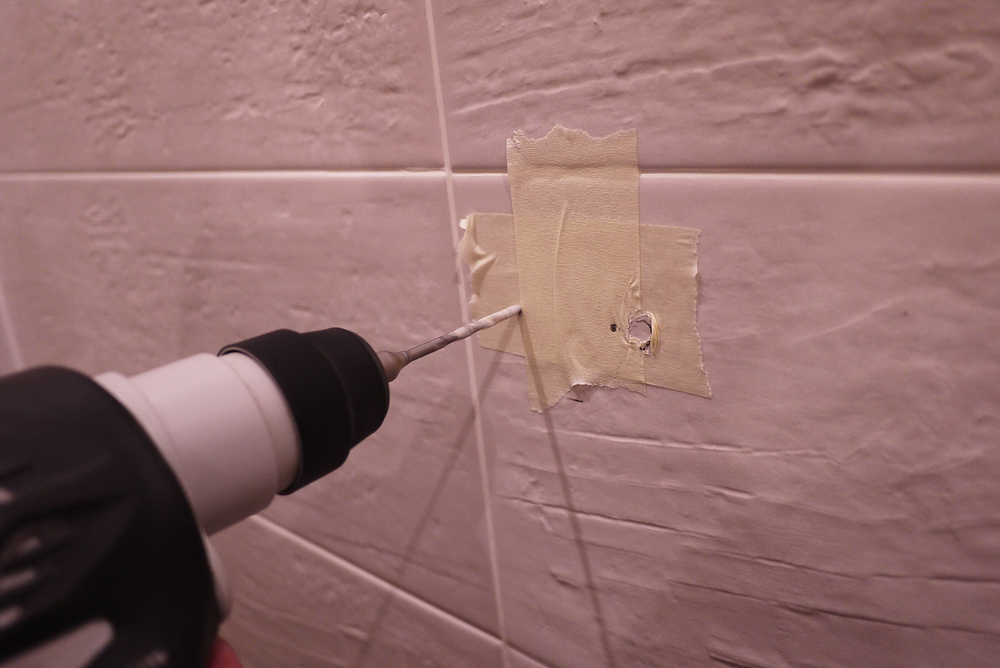
Masking Tape Technique
The masking tape technique is a simple but effective way to prevent drill bit slippage and damage to the tile. Here is how to use it:
- Clean the tile surface to ensure the tape sticks properly.
- Cut a piece of masking tape to the desired length and apply it to the tile where you want to drill.
- Use a marker to indicate the exact spot where you want to drill.
- Repeat the process for all the holes you need to drill.
Make sure the tape is secure and covers the entire area around the hole to avoid chipping the tile. The masking tape also helps in marking the exact spot where you want the hole, making it easier to drill accurately.
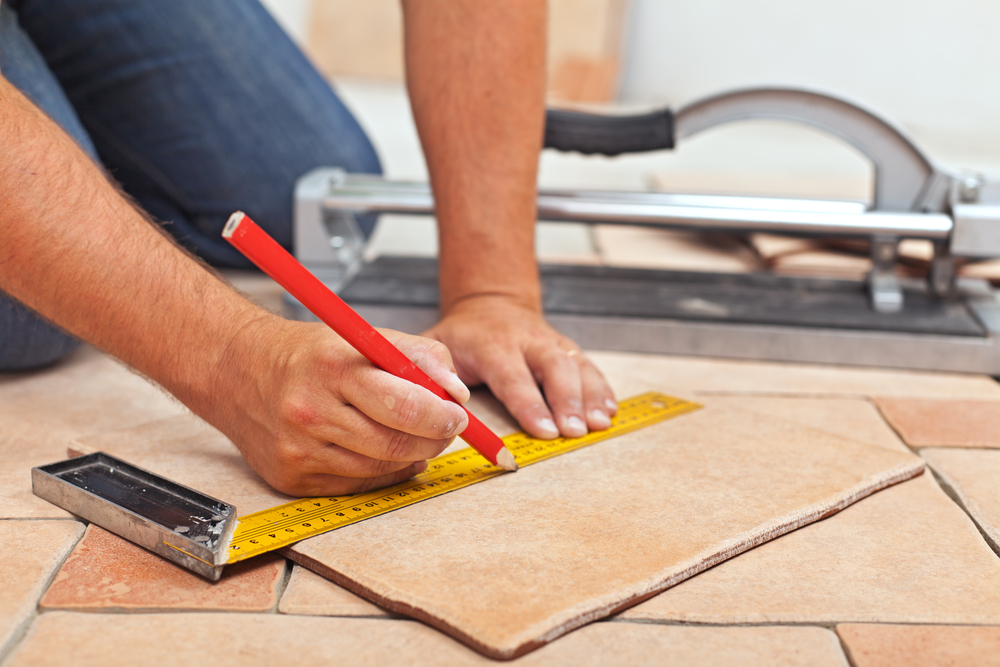
Marking Drill Points
Once you have applied the masking tape, it’s time to mark the drill points on the tile surface. Here’s how:
- Place your drill bit on the marked spot and use your marker to make a small indentation on the tape surface.
- This indentation will act as a guide for your drill bit and prevent it from slipping when you start drilling.
Make sure you mark the drill points accurately and precisely to avoid any mistakes. Once you have marked all the drill points, you’re ready to start drilling.
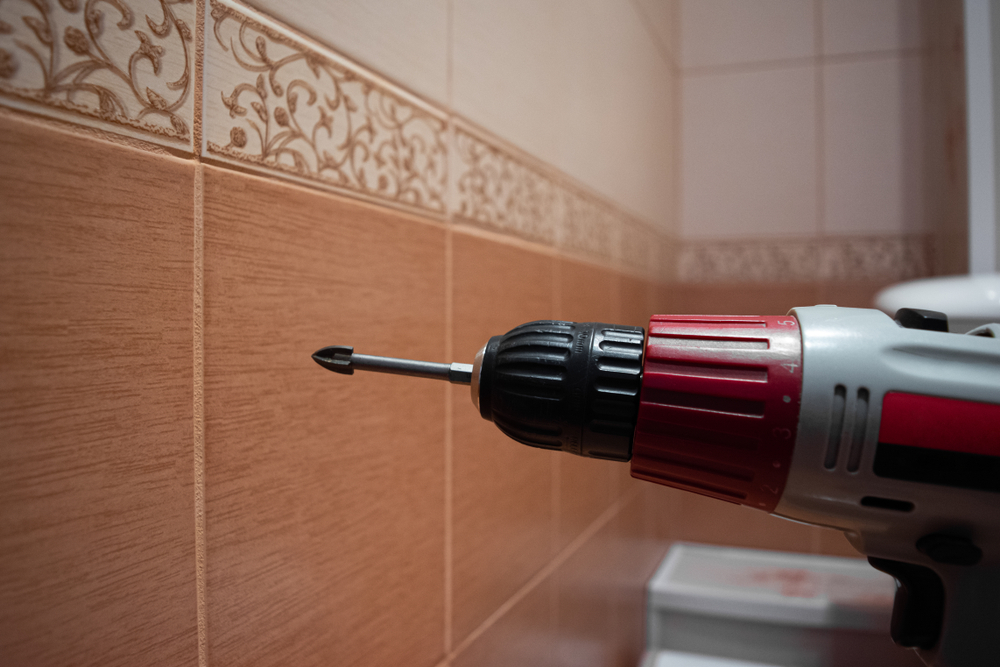
Selecting the right drill bit
Choosing the right drill bit is crucial for successful tile drilling. Not all drill bits are suitable for tile surfaces, so it’s important to use tile-specific drill bits to avoid damaging the tile. Diamond-tipped drill bits are the most common type of drill bit for tiles, as they are durable and can easily cut through hard materials.
Types of drill bits
There are different types of drill bits available, with varying sizes and materials. Here are some of the most common types:
- Diamond-tipped drill bits: These drill bits have a diamond coating that allows for easy penetration of hard materials, such as tiles. They are durable and long-lasting.
- Carbide-tipped drill bits: These are another type of durable drill bit that can be used on tiles. They have a carbide tip that can withstand high temperatures without losing their sharpness.
- Masonry drill bits: Masonry drill bits are designed for drilling through brick, concrete, and other masonry materials. They can also be used on tiles, but they are not as effective as diamond-tipped or carbide-tipped drill bits.
Choosing the right drill bit
When selecting a drill bit for tile drilling, consider the size of the hole you need to make and the type of tile you are drilling. Diamond-tipped drill bits are the best choice for drilling through ceramic and porcelain tiles. However, if you’re drilling through natural stone tiles, you may need to use a special type of drill bit designed for that specific material.
It’s also important to choose the right size drill bit for the job. The size of the hole you need to make will determine the size of the drill bit you should use. Make sure to measure the diameter of the screw or anchor you’ll be using to ensure you choose the correct size drill bit.
Before starting your project, make sure you have the appropriate drill bits for the job. Having the right tools will make your tile drilling experience much smoother and more efficient.
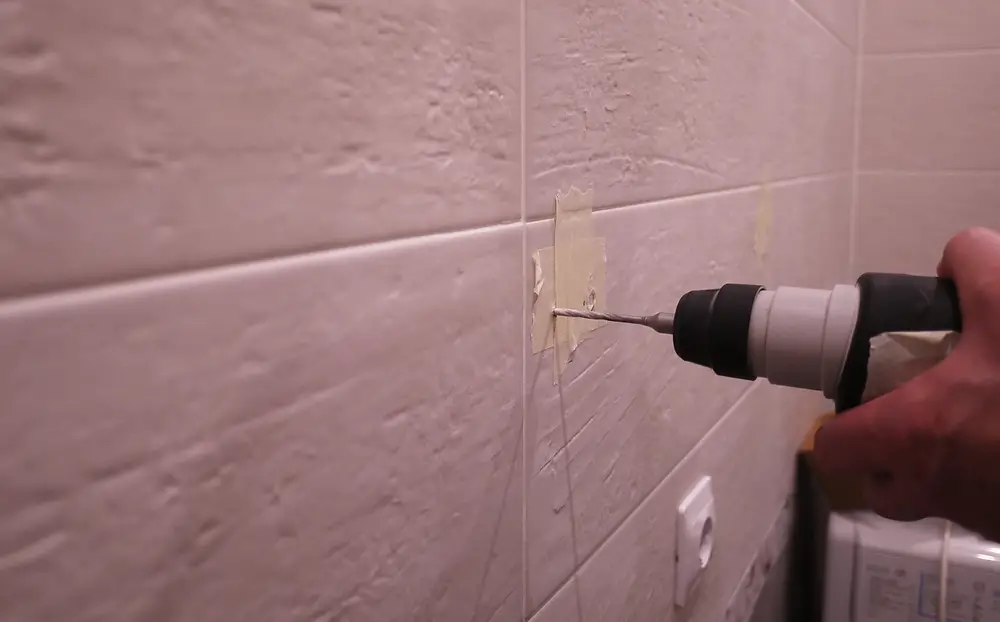
Drilling technique for tiles
Now that you’ve prepared the tile surface and selected the appropriate drill bit, it’s time to master the proper drilling technique. This involves applying gentle pressure, maintaining a slow drilling speed, and using water lubrication to prevent tile damage and achieve a clean hole.
Applying gentle pressure
When drilling into tiles, it’s important to apply a gentle pressure to avoid cracking or damaging the surface. Too much pressure can also cause the drill bit to slip, resulting in an uneven hole.
Start by holding the drill perpendicular to the tile surface and applying gentle pressure. As you feel the drill bit begin to penetrate the tile, you can gradually increase the pressure. Avoid forcing the drill bit through the tile, as this can cause it to crack.
Maintaining a slow drilling speed
Drilling into tiles requires patience and a slow drilling speed. A high speed can generate too much heat, leading to tile cracks or damage.
Set your drill to a low speed and maintain a steady pace throughout the drilling process. This will help prevent the tile from cracking or chipping, and ensure a clean hole.
Using water lubrication
Water lubrication is key to drilling into tiles successfully. It helps to cool down the drill bit, prevent heat build-up, and minimize the risk of tile damage or cracking.
Begin by placing a small amount of water on the tile surface where you will be drilling. You can either use a spray bottle or simply dip the drill bit into a container of water. During drilling, continue to add water to the surface as needed to keep it lubricated.
- Apply gentle pressure
- Maintain a slow drilling speed
- Use water lubrication
By following these steps, you can master the drilling technique for tiles and achieve a professional-looking result every time.
Dealing with tricky situations
Drilling into tiles can be challenging, especially when dealing with certain situations such as drilling near edges, drilling through glazed tiles, or drilling mosaic tiles. Here are some tips on how to overcome these challenges:
Drilling near edges:
When drilling near the edge of a tile, it’s important to use caution and avoid putting too much pressure on the tile. Start by marking the drill point on the tile surface. Then, place a small piece of masking tape over the area to prevent the drill bit from slipping. Slowly drill into the tile with a steady hand until you reach the desired depth.
Drilling through glazed tiles:
Glazed tiles can be harder and more slippery than other types of tiles, making them more difficult to drill. To prevent the drill bit from slipping, start by marking the drill point on the tile surface with a marker. Then, use a diamond-tipped drill bit and apply gentle pressure to the drill. Keep the drill bit cool by using a steady stream of water as lubrication. This will prevent the tile from cracking and allow the drill bit to cut through the glaze.
Drilling mosaic tiles:
Mosaic tiles can be particularly delicate and prone to cracking, so it’s important to use the right technique when drilling into them. Start by marking the drill point on the tile surface with a marker. Then, use a small drill bit and apply gentle pressure to the drill. Keep the drill bit cool by using a steady stream of water as lubrication. Avoid using too much pressure, as this can cause the tile to crack. If the tile does crack, stop drilling immediately and replace the tile.
Finishing touches and clean-up
Now that you’ve successfully drilled into your tiles, it’s time to complete some finishing touches and clean-up. Follow these steps for a professional finish:
Removing masking tape
Carefully remove the masking tape that you used to mark the drill points. Start by pulling away the tape from the edges and slowly work your way towards the centre. This will help prevent any damage to your newly drilled holes or the tile surface itself.
Cleaning tile surface
Using a clean and damp cloth, wipe down the tile surface. This will help remove any debris or dust left behind from drilling. If necessary, you can also use a gentle cleaning solution to ensure a spotless finish.
Adhesive and anchor insertion
If you’re attaching a fixture to the tile, such as a shelf or mirror, now is the time to insert the adhesive or anchor. Follow the manufacturer’s instructions carefully and make sure the adhesive or anchor is securely in place before attaching your fixture.
By following these simple steps, you can ensure a professional and polished finish to your DIY project. Don’t forget to take a step back and admire your handiwork!
Safety Precautions
When it comes to drilling into tiles, safety should always be a top priority. Taking proper precautions can prevent injuries and ensure a successful project. Here are some safety measures to keep in mind:
Safety goggles are essential
Protect your eyes from debris and dust by wearing safety goggles during the drilling process. They may not be the most fashionable accessory, but they can prevent serious eye injuries.
Wear protective clothing
Drilling into tiles can create a lot of dust and debris. Protect your skin and clothing by wearing long sleeves and pants, as well as closed-toe shoes. This will also prevent any small tile shards from embedding into your skin.
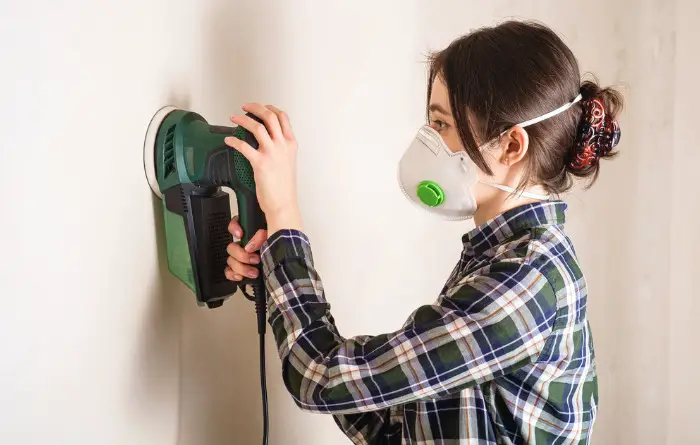
Use a dust mask
Breathing in tile dust can be harmful to your lungs and respiratory system. Wear a dust mask to prevent inhaling any harmful particles.
By taking these safety precautions, you can ensure a safe and successful drilling experience. Remember, safety first!
Troubleshooting common issues
Despite your best efforts, some unexpected issues may still arise while drilling into tiles. Here are some common problems and how to troubleshoot them:
Tile cracks
Tile cracks can occur when there is too much pressure applied during drilling or the wrong type of drill bit is used. If you notice a crack appearing, stop drilling immediately to avoid further damage to the tile.
To prevent tile cracks, ensure that you apply gentle pressure and use a drill bit that is suitable for the type of tile you are drilling. Diamond-tipped drill bits are often the best choice for hard tiles like porcelain.
Drill bit slippage
Drill bit slippage is a common problem, especially when drilling on glossy or glazed tiles. This can cause scratches or even breakage of the tile.
To prevent drill bit slippage, use masking tape to create a guide for the drill bit. This will help keep the bit in place and prevent it from slipping. Additionally, make sure to maintain a slow and steady drilling speed to avoid pressure buildup and slipping of the bit.
Tile chipping
Tile chipping can occur when a drill bit exits the tile on the other side, causing a piece of the tile to chip off.
To prevent tile chipping, place a small piece of wood or backing material behind the tile to provide support and reduce the pressure on the tile. Make sure to drill slowly and steadily and use water lubrication to keep the drill bit cool.
Conclusion
So there you have it! I hope this guide on how to drill into tiles has been informative and helpful. By understanding the tile composition and gathering the necessary tools and materials, you can achieve great results. Remember to always prioritize safety by wearing protective clothing, safety goggles, and a dust mask.
Final Thoughts
Whether you’re hanging a mirror or installing shelves, the proper drilling technique is essential for any DIY enthusiast or homeowner. By using the right drill bit and maintaining a slow speed with gentle pressure, you can prevent tile breakage and achieve a professional finish every time.
Happy Drilling!
- Drill Battery Maintenance: Essential Tips for Cordless Drill Battery Care - February 5, 2024
- Troubleshooting Drill Issues - February 5, 2024
- Quick Drilling Techniques - February 2, 2024